2FA works through an independent app such as Duo or Google Authenticator installed on a separate device. When used, logging in is a two-step process, requiring a second confirmation from the app. / device. Without confirmation from the 2FA app, the login will not proceed.
Add Two-Factor Authentication
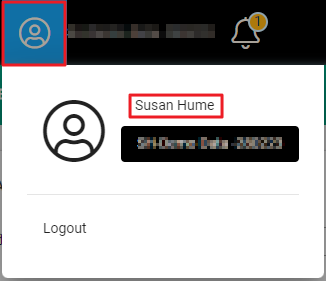
To add two-factor authentication, while logged in click on the profile icon then on login name.

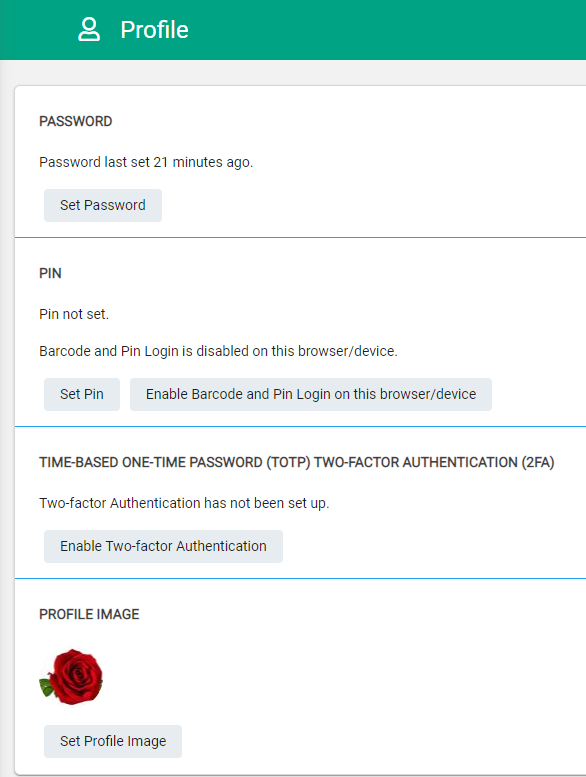
Your profile information opens. Select Enable Two-Factor Authentication.

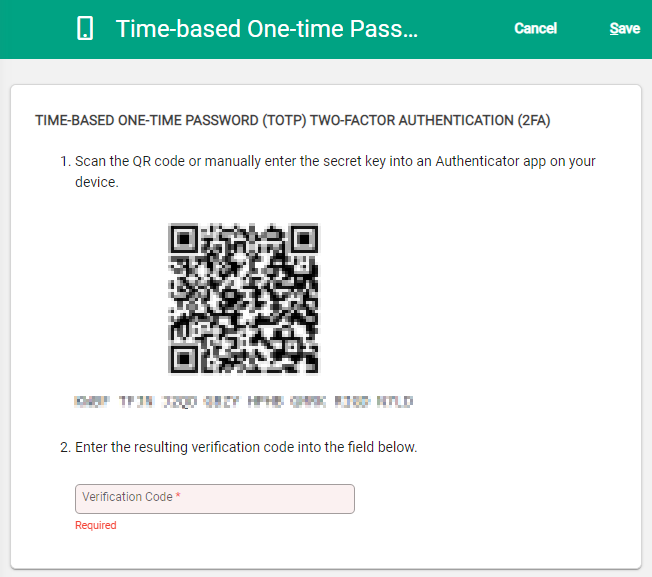
The Two-Factor Authentication screen opens.

From within the 2FA app on your phone scan the QR code. A code will be provided in your 2FA app. Enter this into the Verification Code field. Select Save in the toolbar.
It is standard for 2FA apps to refresh every thirty seconds. Within the app, refresh to get a new code.
Logging in with Two-Factor Authentication
2FA is managed separately within your app and your configuration within the app determines how you will log in.
Prompt
For users who have their 2FA set to a Prompt-type approval, a notification is sent to your phone when you enter your credentials. Tap to approve and complete the login.
Manual entry
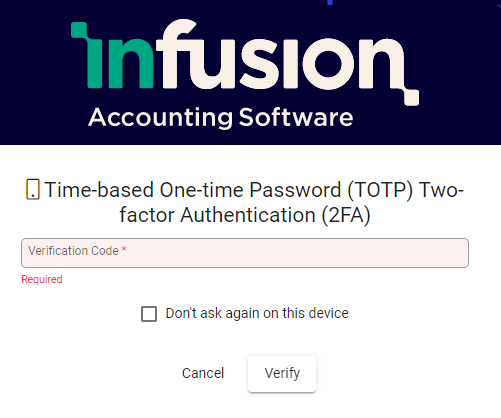
For users who have selected manual approval, upon entering your credentials and selecting login you are taken to the two-factor authentication screen. Enter the Verification Code from your 2FA app and select Verify to continue to login.

Don't ask again on this device permanently approves access on the current device - further logins on the same device will not require 2FA. If you move to a new computer, 2FA is again required.
Removing Two-Factor Authentication
If 2FA is no longer required, it is important to remove it from Infusion first then from your app.
To remove 2FA, within Infusion, go to your profile information and select Disable Two-factor Authentication.

A notification message requires confirmation. Select Delete to confirm.

Two-factor authentication is now inactive within Infusion. It remains available in your 2FA app and can be re-instated at any time.
For any issues with your Two-Factor Authentication, you will need to contact your 2FA application provider for support. It is important to ensure that you register your 2FA account with the ability to restore when setting up your 2FA for the first time.

