There are four ways to create a new Supplier Invoice:
- From the Suppliers Invoice screen, select +Add from the toolbar
- From the Suppliers screen select the spill menu at the end of the supplier row and choose Invoice from the expanded menu.
- Within the Supplier Account, select ...More Options from the toolbar and choose Invoice from the menu.
- Via the Omni icon, select Invoice from the Suppliers options.
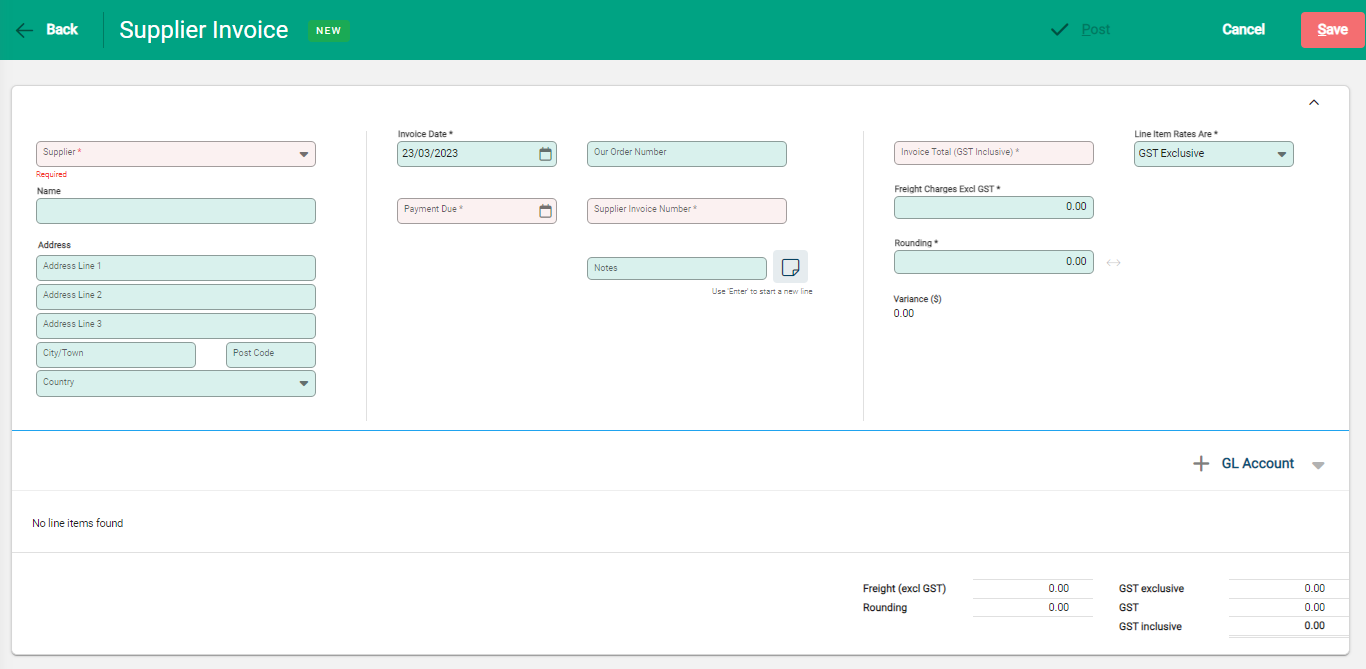
The new Supplier Invoice window opens.

The invoice is broken into sections and required fields are indicated with an asterisk. If the invoice was created from within a Supplier account the account details will be populated.
Invoice information
- Choose the Supplier from available options in the drop-down. The Name field updates to the Supplier chosen. Over-write this if required. The Address fields auto-populates with available details.
- Enter the Invoice and Payment Due dates. The Payment Due date is calculated from the Invoice Date inline with the Payment Terms within the Supplier account and is an editable field if required.
- Supplier Invoice Number is a required field. Also include Our Order Number and any additional notes to help explain the invoice.
- Enter the Invoice Total. This is always GST Inclusive
- Select if the individual Line Items Rates Are GST inclusive or exclusive. This sets the Rate field when entering line details. When lines are added to the invoice, they must all be either GST Inclusive or GST Exclusive.
- If Freight Charges or Rounding are applicable, update these fields. The Variance auto-calculates and must be at zero to complete the invoice.
GL Account lines
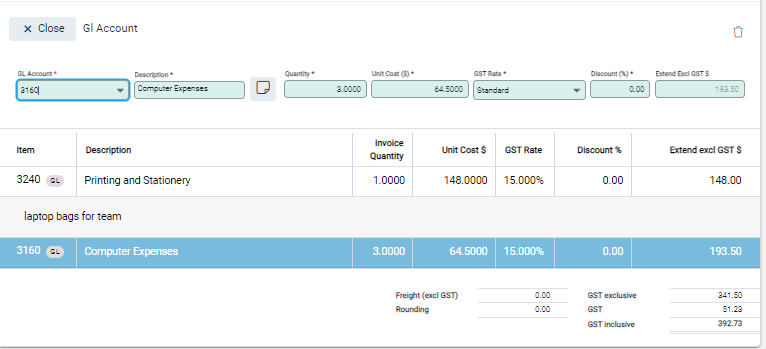
Non-Product invoices use GL Accounts to charge expenses to. Select +GL Account to add a GL Account to the invoice.

- Select the GL Account to charge to. The Description field updates to show the GL Account. This can be over-written if more specific detail is required.
- Update the Quantity and set the GST Rate.
- Enter the Rate as either GST Inclusive or Exclusive depending on the header setting. Update the Discount field to reflect any discounts received. The Extend Excl GST ($) updates automatically to calculate the discount.
- Enter the Unit cost.
Notes
Notes can be added either on the header section of the invoice (through the Notes field) or on a line. To add a line note select the drop-down arrow next to +GL Account then Note.
A Note entry line opens. Enter in required text.

The Note displays on the next line. Continue to add transactions below the notes as applicable.

Edit lines
To edit lines, select the row within the list. Entry fields open above the line list. Make changes to fields as required.
Delete lines
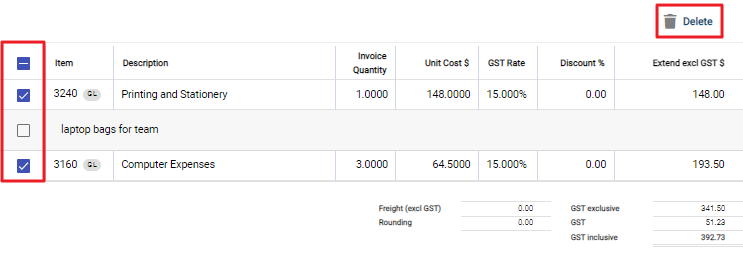
Lines can be deleted individually or as a group.
To delete an individual line select the row to activate it. A rubbish bin icon displays above the fields. Select this to delete.
To delete multiple rows, select the checkboxes at the start of the applicable rows. The GL Account button is replaced with a Delete button. Select to remove rows.

When all information has been added to the invoice it can be Saved or Posted.
To Save an Invoice select Save in the toolbar. The invoice is saved as Unposted and can be recalled at a later time. Until the invoice is posted it is effectively a draft and not included in any financial reporting within Infusion.
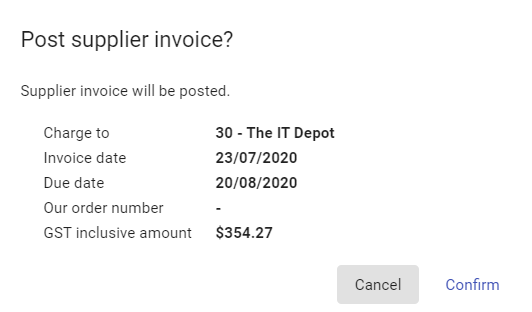
To Post an Invoice select Post from the invoice toolbar.

Confirmation details of the invoice display.

Select Confirm to Post. The invoice is recorded in Infusion as a financial transaction.

