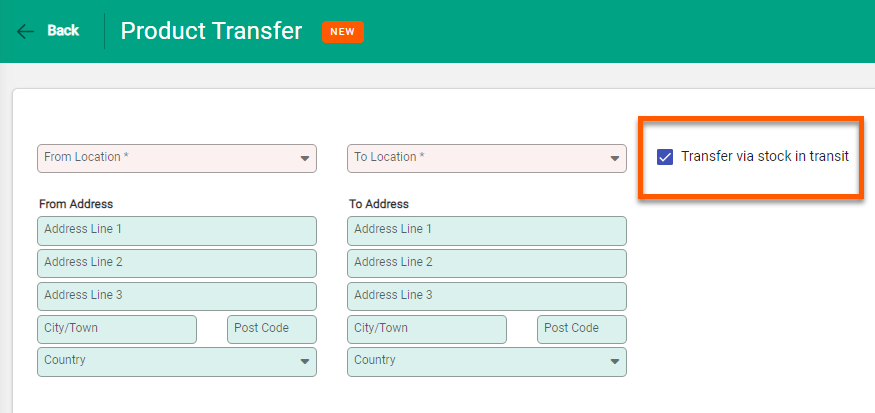
In order to do an In Transit transfer between locations, the option to transfer via stock in transit must first be enabled. For the steps on how to enable this setting, see Product Settings.
Transferring stock into an In Transit state
Open the products module and navigate to the Transfers function, choose Add to create a new product transfer. With the in transit option active a new option is displayed on the screen, allowing you to set the transfer as being In Transit.
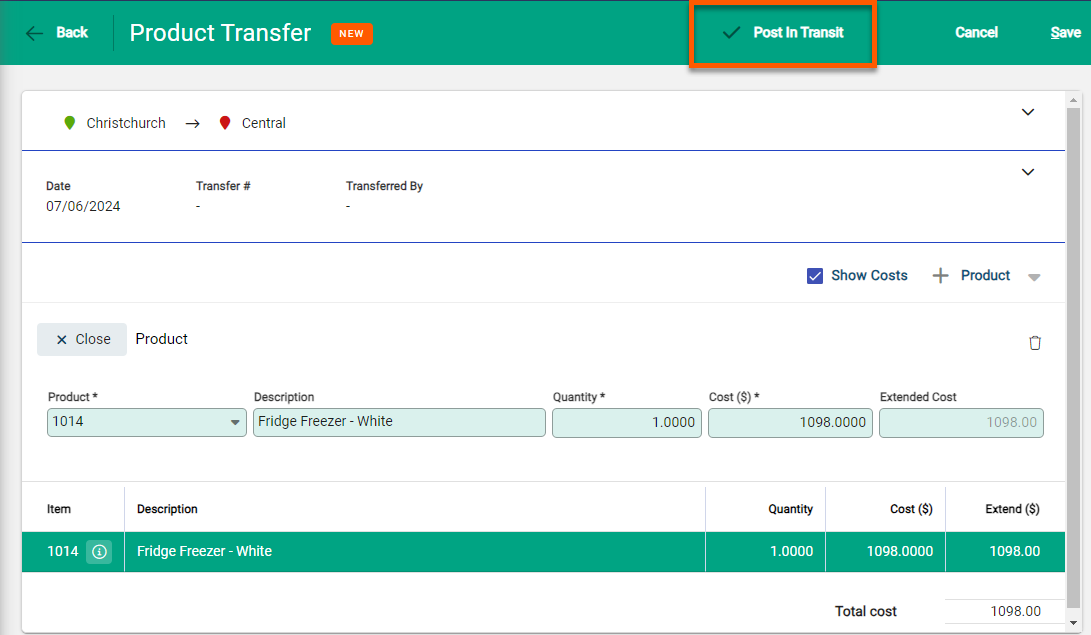
Select the From and To locations, and add the products to be transferred. Once the transfer is ready, choose Post in transit.
This brings up the confirmation screen, including an advisory about the product being in transit
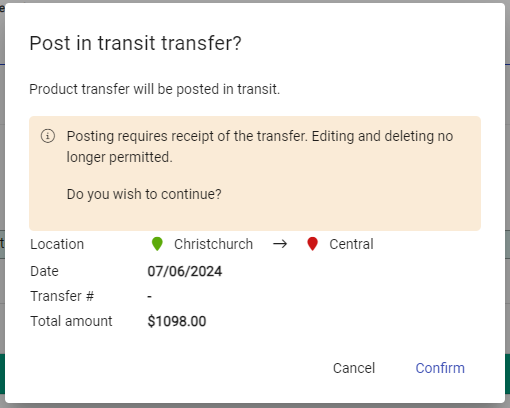
When a transfer is in the “in transit” state, it cannot be edited or deleted. Instead, it can only be receipted by the receiving location.
Viewing in transit transfers
When opening the Transfers function, there’s a new column visible, Via In Transit.
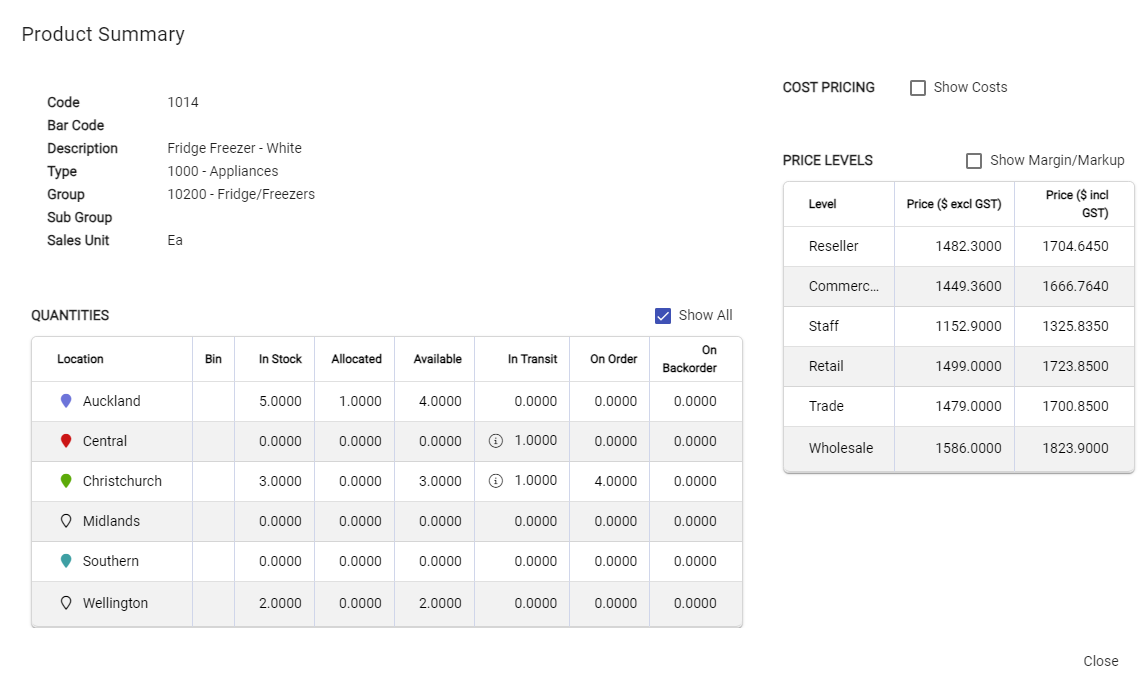
Additionally, opening the product summary window on any page, the In Transit column shows the number of items being transferred as well as which locations are transferring from and to.