To create a new customer payment with no existing details populated:
- From the main menu select Customers > Payment and select +Add from the toolbar.
- Using the Omni icon in the header select +Payment in the Customers menu.
To create a new payment with customer details pre-populated:
- From the Customers screen select the spill menu at the end of a customer row, open the menu and select +Payment.
- From within a customer record, select ...More Options in the toolbar and choose +Payment from the menu.
The New Payments window opens.
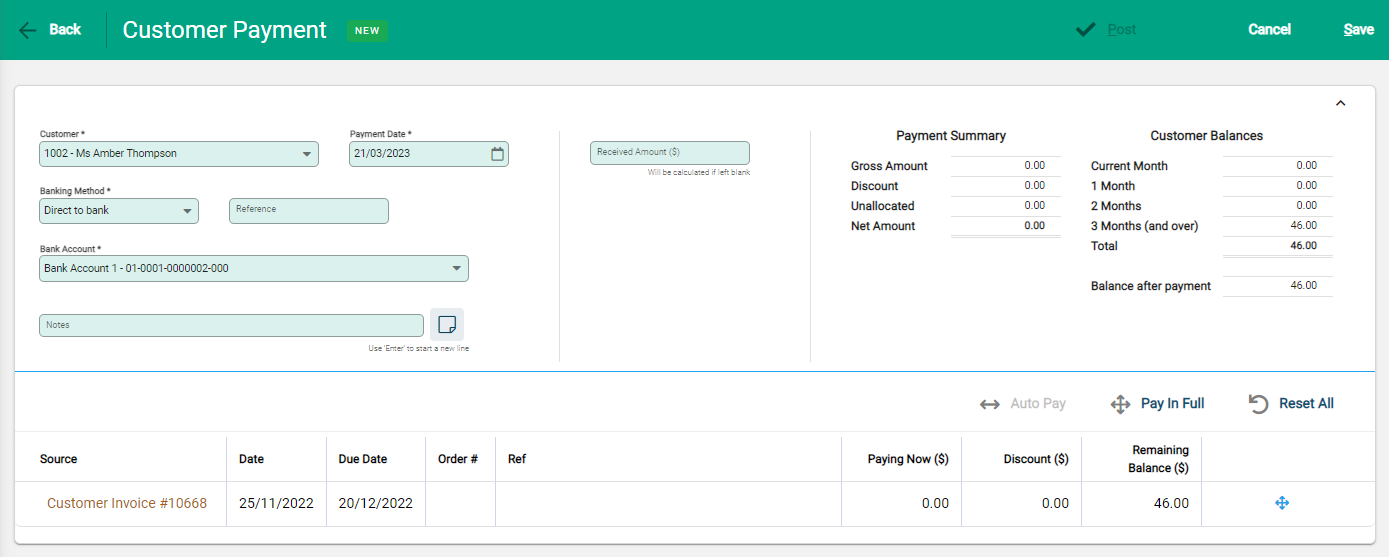
If the customer details are not populated, select the customer to receive the payment from.
Update the payment details, changing the Payment Date and Bank Account details if required. It is important that the Banking Method is set correctly as this impacts the daily banking.
Received Amount
It is optional to enter a value into the Received Amount. An amount can be entered, and until it is allocated to invoices, is Unallocated. Or it can be left blank, with payment applied directly to invoices.
Summary Balances
Summary balances show tracks payment allocation and balances update as payments are applied to invoices.
The Payment Summary shows the details of the payment.
- Gross Amount - the total of payments allocated and discounts applied.
- Discount - total of any discounts applied to invoice payments.
- From Unallocated Funds - the amount of the payment that has used Unallocated balances.
- Unallocated - the remainder of the payment to be allocated.
- Net Amount - the total payment made by the customer, excluding any discounts applied.
Customer Balances show outstanding balances and the Balance after payment updates as the payment is applied.
A list of outstanding invoices for the customer displays beneath the payment details.

Payment buttons provide payment options. These can be used either globally - above the list, or individually - beside invoices. Additionally, an invoice can be selected to manually apply payment.
Auto Pay
Auto Pay is only available when a Received Amount is entered. The payment is allocated until it is used up and if there is a surplus, this is processed as Unallocated.
Global Auto Pay applies payment from the oldest invoice onwards. Using Auto Pay individually applies the available payment to the invoice. If there is insufficient funds, a partial payment is made against the invoice.
Pay in Full
Pay in Full pays an invoice in full. The global option pays all invoices, or it can be used individually against specific invoices.
Reset All
This can be used globally, or individually against invoices and clears all payment amounts. When used globally, any Received Amount is also cleared.
Payment of specific invoices
To apply payment to specific invoices, select the invoice from the list. Entry fields activate above the table and the selected invoice is highlighted blue.
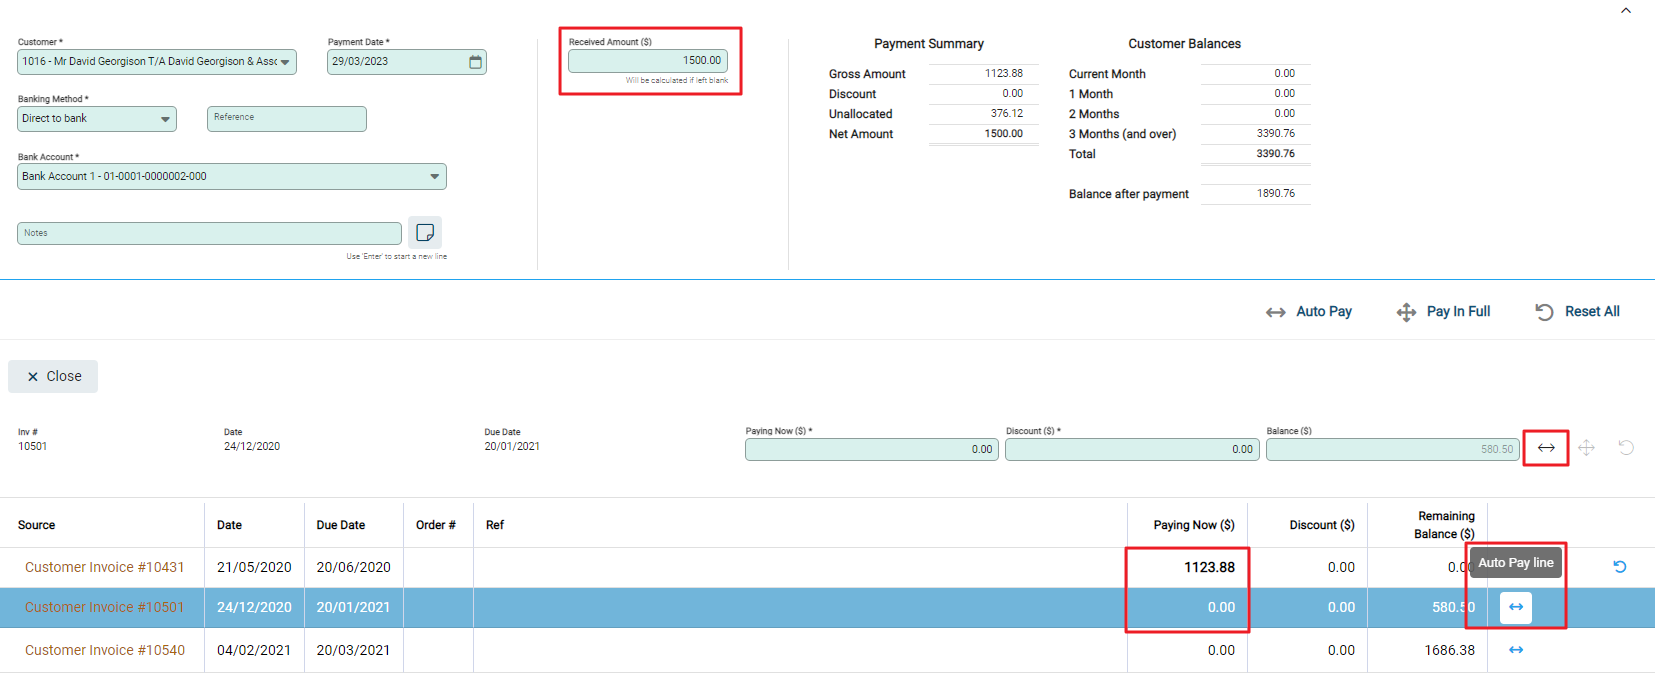
Update the fields in the entry row:
- Paying Now ($) - Enter the amount the customer is paying against this invoice. This may be a partial amount or in full.
- Discount ($) - If a discount is being applied to the invoice, enter the amount in this field.
- Balance ($) - The remainder of the invoice after payment and discount have been applied, this is a non-editable field.
- Arrow symbols - Use the double-ended arrow symbol to add the remaining balance to the Paying Now field. Use the circular arrow to reset the row.
- Pay in Full - Pay the invoice in full
- Reset - undo the payment
Enter the payment details and Close. Continue to select invoices to update payments against, closing after each entry.
When the payment is allocated, select Post from the toolbar to confirm and process.
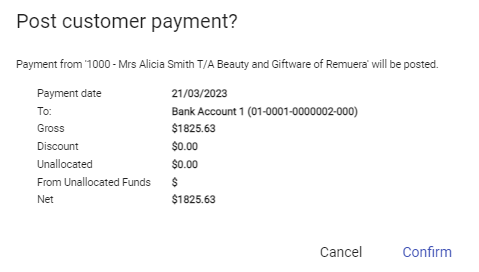
The payment is now a permanent record in Infusion.
How to process a customer payment to a cash drawer
If the logged in session has an active POS Terminal use the "Send payment to POS cash drawer" when accepting payment by a non-"Direct to Bank" banking method is shown and the user can tick it to send it to the cash drawer.


