You can create a cashbook receipt at Financials > Cashbook Receipts > Add. Or you can create one from the specific bank account at Financials > Bank Account and selecting the spill menu next to the bank account.
The new Cashbook Receipt window opens.
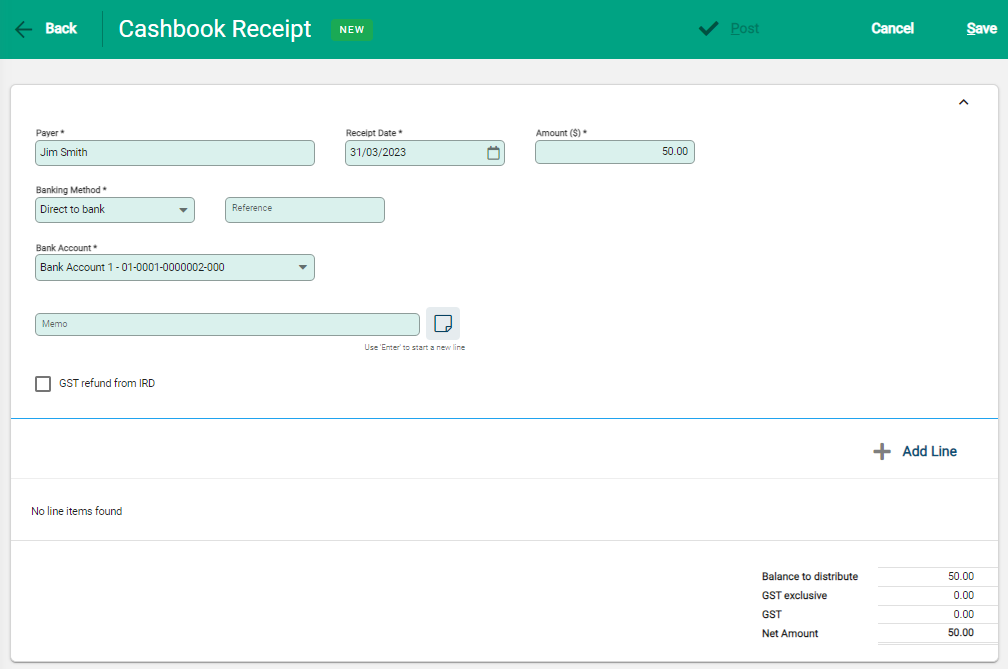
A receipt has two sections to complete. The first is for the payer details, and the second for GL Accounts.
Payer details
Enter values for the Payer, Receipt Date, Amount, Banking Method and Bank Account. Fields indicated with an asterisk are mandatory. The Payer field is free text.
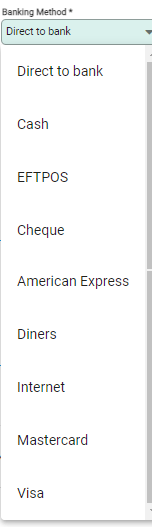
The Banking Method for a receipt is important as it determines if the value is to be included in the daily banking or not (if made directly to the bank).
GL Account details
After updating the payer details select +Add Line.

Enter details for each line required:
- Select the GL Account from the drop-down list. The Description field automatically updates and is available for overwriting.
- GST - Select the applicable GST Rate from the drop-down. Rates can be applied on a line by line basis. Ensure that the Amount Is field is correctly set to Include or Exclude GST.
- Amount - Enter the value in the Amount field - this is either a dollar value or a percentage (of the header amount entered). When using percentage values, a % symbol is necessary after the amount, e.g. 25%
A receipt may have multiple lines added to it. Select +Add Line to continue adding lines. The current line updates in real time as entry fields are updated.
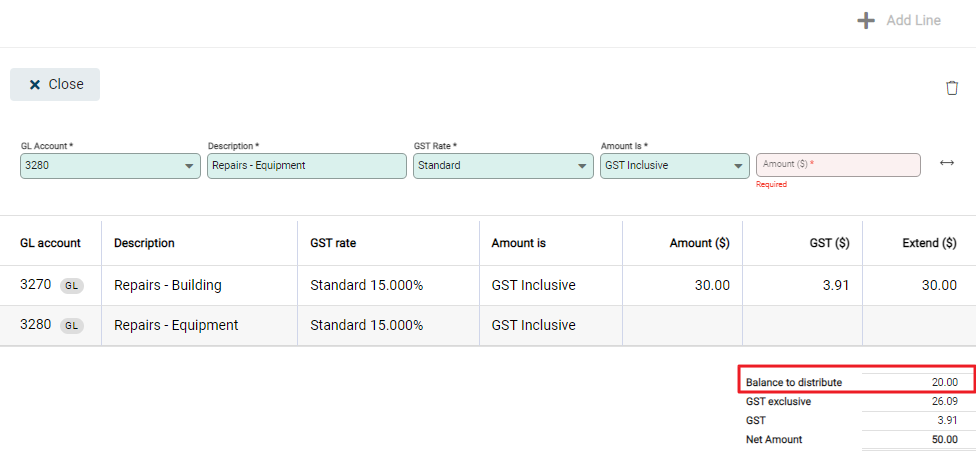
As lines are added the Balance to Distribute adjusts. This needs to be at zero before a transaction is ready to Post.
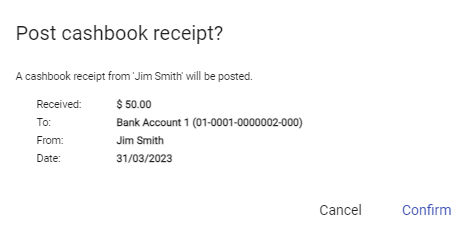
Post the cashbook receipt
To post the receipt and have it included it in financial records, select Post from the toolbar.

The final confirmation window displays. Check the details and Confirm to complete. The receipt posts and becomes a recorded financial transaction, GL Account balances are updated and it is available to reconcile.
View the cashbook receipt
To view to the Cashbook Receipt, go to Financials > Cashbook Receipts. A list of Unposted Cashbook Receipts displays.
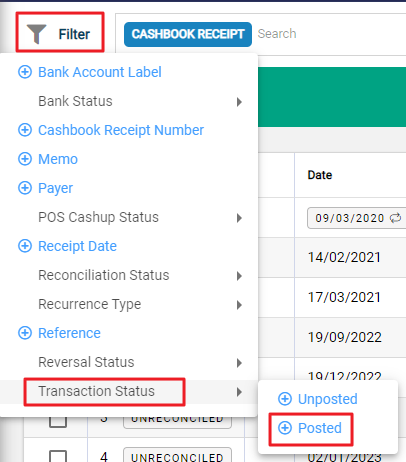
The filter can be cleared, to view all Cashbook Receipts, or used to change the Transaction Status to view only Posted receipts.
Further filters can be applied, for example to specify date ranges and other status', and to target searches to selected fields, such as the Cashbook Receipt Number or Payer columns.
Alternatively, use the search field to enter known details and further refine results.

