Table of Contents
Set the stocktake date and timeSelect the products to include in a stocktake Subtract allocated quantities when calculating expected quantityView the stocktake products screen Export stocktake sheetsDelete a stocktakeGo to Products > Stocktakes and select +Add from the taskbar.

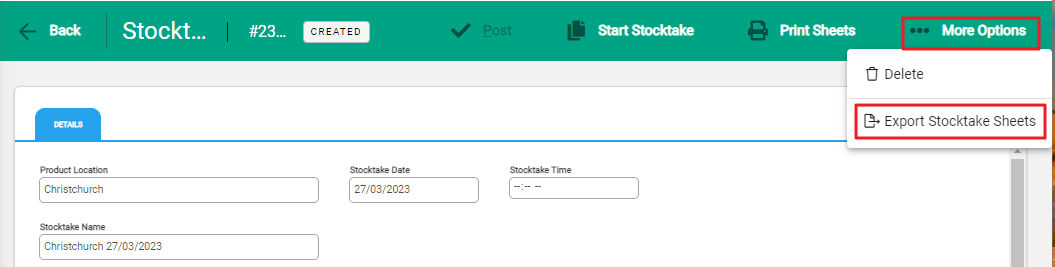
A new Stocktake screen will display. Complete the fields.
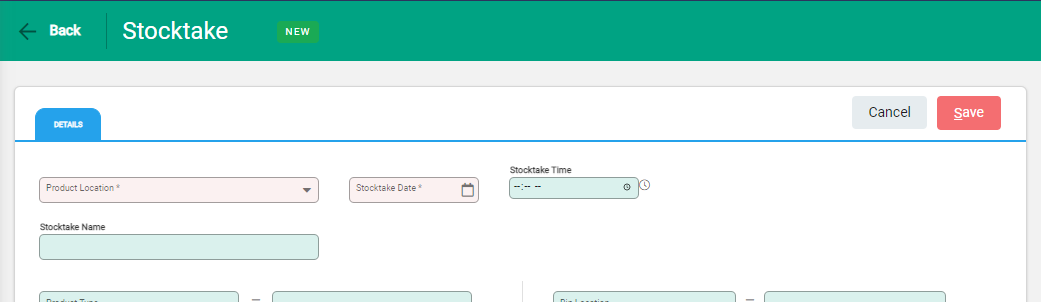
- Product Location: The location of the products you will include in the stocktake.
- Stocktake Name: The name of the stocktake. This will default to the location and date of the stocktake but the field can be edited.
- Stocktake Date: The date of the stocktake count.
- Stocktake Time: The time of the stocktake count.
Set the stocktake date and time
Leaving the time empty will mean the stocktake will start at the end of the day (midnight) and the stocktake will take into account all the day's transactions. Alternatively, if you create and complete the stocktake on the same day, you can enter a time that is now or in the past to enable the stocktake to be started immediately.
For example, a stocktake dated 31/10/21 at 2pm means that Infusion calculates stock availability at that specific time, ignoring transactions posted after that time on the same date.
Select the products to include in a stocktake
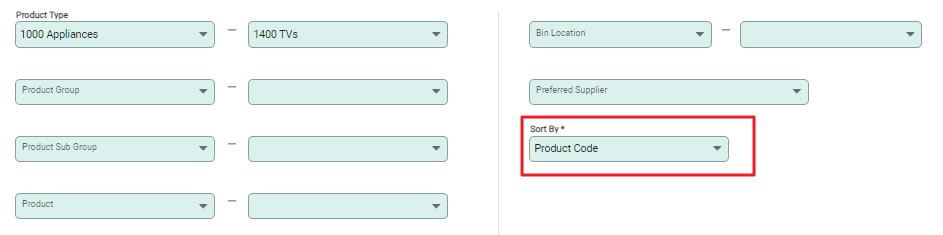
The next section of the stocktake screen allows you to select ranges of products to include in the stocktake. Select the required products by ranges of product type, product group, product sub-group, and product code.
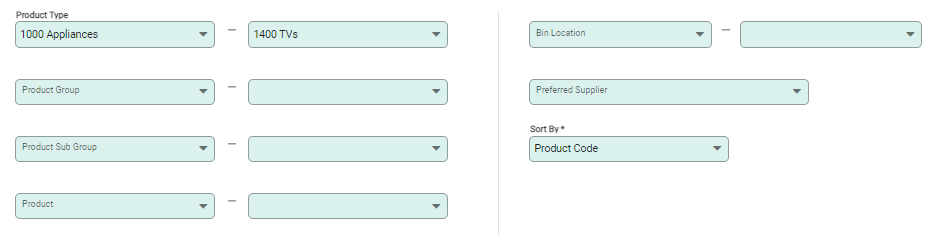
Products can also be selected based on a range of Bin Locations or for a Preferred Supplier of the items.
The table below the range selections updates as you complete the fields to show the number of products included in the stocktake.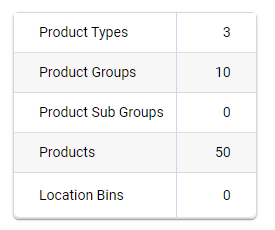
If you select products that are already included in an active stocktake for the same location, you will receive a notification.

Advice for adding products to the stocktake
- If you want to include every product in the stocktake, leave the fields blank.
- If you only complete the 'From' field on the left, the stocktake will include all products that match and come after the value.
- The value entered in the 'From field must always be less than the value in the 'To field'. If its not a notification is displayed advising this.
Subtract allocated quantities when calculating expected quantity
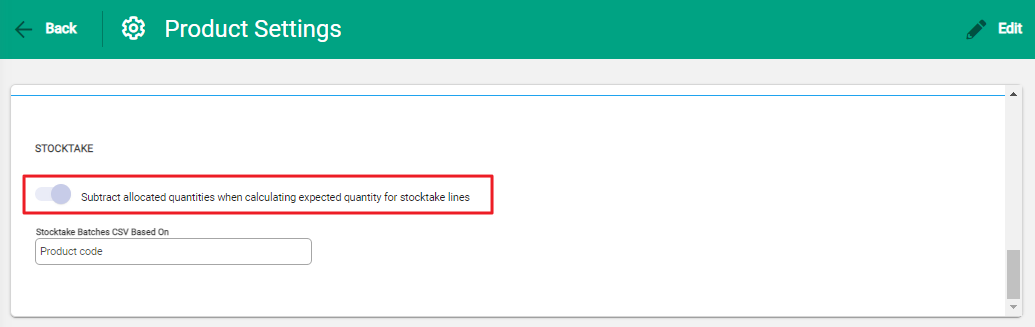
In Settings > Product Settings, you can choose to 'Subtract allocated quantities when calculating expected quantity for stocktake lines'. This option is on by default for new and migrated datasets.
- When this option is selected, the stocktake will not expect the allocated quantities to be included in the counted figures, i.e. products on pending invoices have been removed (packed) and are not on the shelf to be counted.
- If this option isn't selected, the stocktake expects the allocated quantities to be included in the counted figures, i.e. products on pending invoices have not been removed and are on the shelf to be counted.
Select the order you want the items to display on the stocktake
Use the Sort By drop-down menu to confirm the order you want the items to appear on the stocktake sheets and on the Products tab (the place where you enter a stocktake count).
Select save to finish creating the stocktake
Select Save in the taskbar to save the stocktake. The Print Sheets button will become available. You can also now select More Options > Export Stocktake Sheets to export a .csv file for the stocktake.
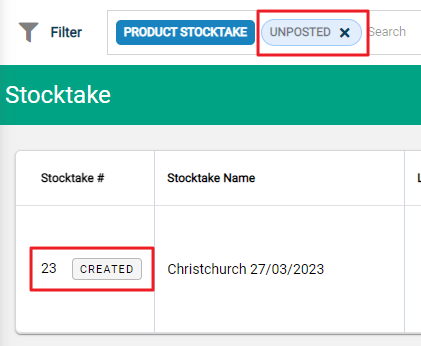
The new stocktake will display as Created and Unposted on the Stocktakes screen. You can still edit the stocktake parameters after this. Once you have started the stocktake, it cannot be edited.
Select Print Sheets to view and download the stocktake sheets. If you notice products are mistakenly included or missing, go back to the product selection parameters and adjust as needed. If the correct products are still not displaying, you may need to update the details in the product record. See the article Edit a Product for more information.
When the stocktake is ready to be carried out you will come back to it to print the stocktake sheets. The Start Stocktake button will be enabled. The time of day the stocktake will be taken at will be either:
- after midnight on the Stocktake Date, if you didn't set a time.
- at the time you entered into the Stocktake Time field.
View the stocktake products screen
You can now view the list of products included in the stocktake on the Products tab.

In Stock, Allocated, and Expected columns
The In Stock column shows the total number of products currently in stock. The Allocated column shows the number of products on unposted/pending invoices dated before the stocktake. The Expected column shows the number of in stock products minus the allocated products.
The In Stock and Allocated figures will change for a stocktake that has only been created if transactions prior to the stocktake are created. These figures won't change once the stocktake is started.

