About website tags
Website tags are optional Product fields that your web developer can make use of when integrating Infusion with a website. The tags can contain a range of types of data from text to numbers to hyperlinks. They're generally used for classifying products. Lists can be created to assist in selection of data used in these fields. If you sell beds, for example, your tags could cover things like brand, model, size, material, and location.
You can create an unlimited number of website tags in Infusion. They operate in a similar way to custom fields. It's worth spending time coming up with a set of logical tags that capture your product data accurately and that will make sense to your staff and customers.
To be able to use website tags for products, you will first set them up in the settings.
Add a new website tag
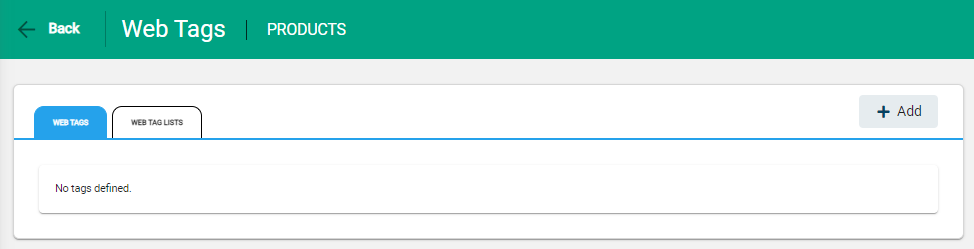
From the main menu, go to Settings > Website Tags in the Products settings. Select Add to add a new website tag.
A web tag window appears. Each tag needs a Tag Type, a Code, and Label. A preview of the tag will appear as you complete the fields. Complete the fields and then select Save. The tag will appear on the Web Tags tab.
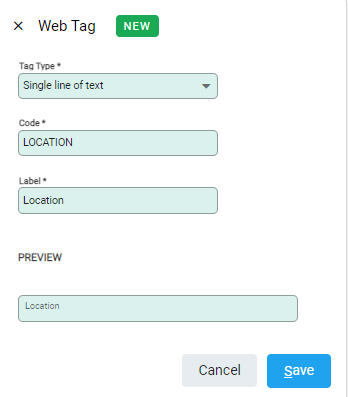
- Tag Type: The format the tag field will appear as. See the next section below for more information.
- Code: A unique reference code for the web tag
- Label: A unique label for this web tag.
The different tag types
You can choose from a range of tag types for each of your web tags. The type you choose will dictate what data can be entered into the field and how it will display.
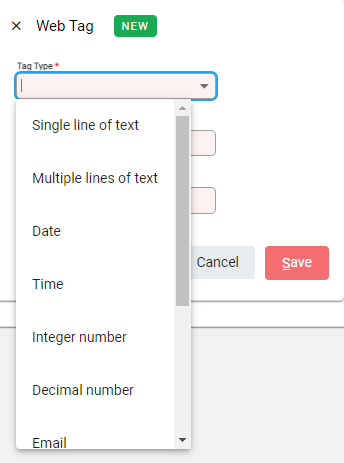
- Single and Multiple lines of text: Free text fields that will be completed manually
- Date and Time: Fields that will enable you to choose date and time tags
- Integer number: A whole number field (eg. 45)
- Decimal number: A decimal number field (eg. 45.00)
- Email and Phone: Fields for entering contact detail tags
- Boolean: A checkbox that someone can select or leave unselected
- Link: A URL field
- Option/Tag list: A pre-configured list field that will offer a drop-down menu in the product settings. See below for details.
Create a web tag list
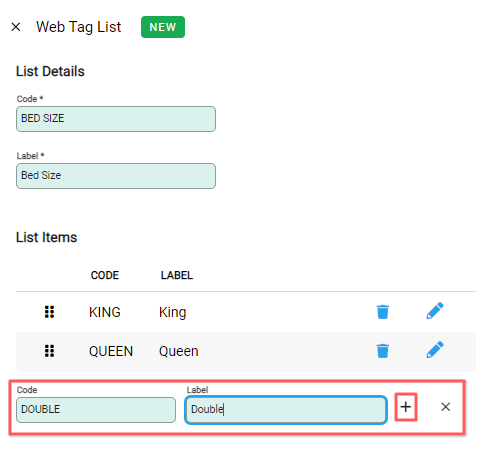
Before you can select a list for a web tag, you first need to create a web tag list. On the Web Tag Lists tab, select +Add.
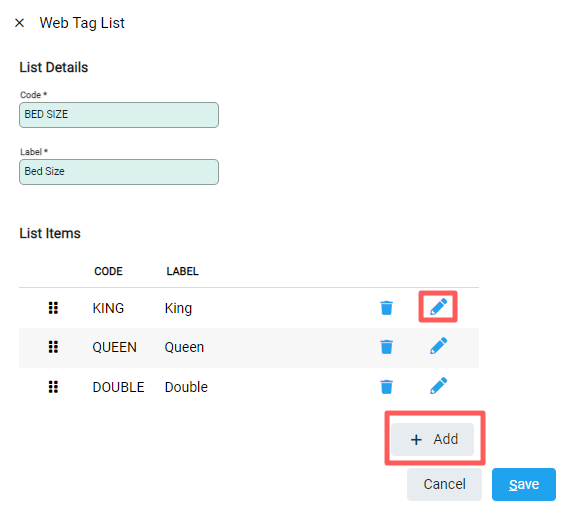
A window appears with fields to add the List Details and the List Items. Complete the List Details fields. To add a new item to the list, enter the Code and Label values then the + icon at the end of a list items row. When you have finished adding items, select Save. To change the order of the list items, select the Move icon to the left of a list item and drag it up or down.
To edit a list after it has been created, select Edit and then select +Add to add more list items. Select the pencil icon at the end of a list item row to edit an existing list item. Select Save to save the list.
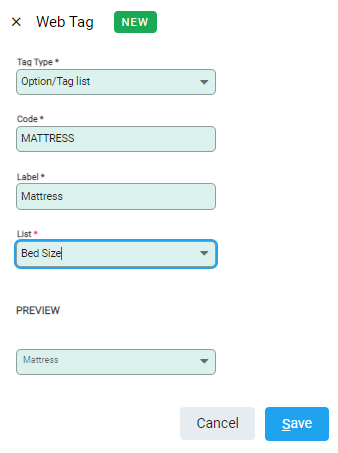
Create a web tag using a list
Now you can create one or more web tags based on the lists you have created.
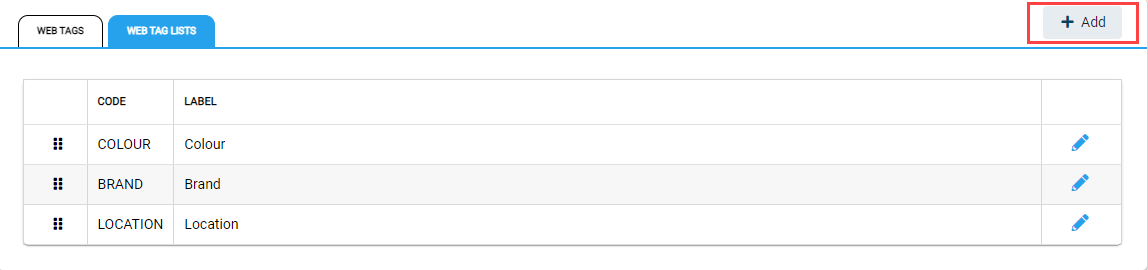
- Go to the Web Tags tab
- Select +Add.
- Choose 'Option/Tag list' from the Tag Type drop-down menu.
- Add the Code and Label
- Select the pre-configured list from the drop-down menu
- Select Save.
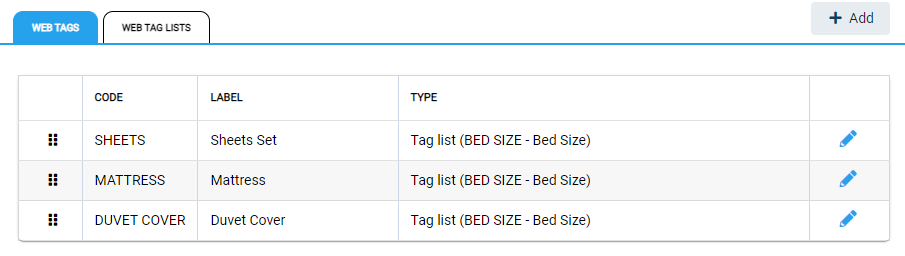
The new web tags will display on the Web Tags tab. In this example, we have three tags that all use the same list.
These tags will display under the Website tab of Products. You can now Add or Edit Website Tags for Products.
Converting Custom Fields to Web Tags
A Product Custom Field can be converted to a Web Tag or vice versa. This functionality allows migrated users to recategorise custom fields historically used as website fields to be viewed in the correct space. The functionality is not available for Option/Tag List Types.

